Saturday 28 April 2012

Irrigation Ditches

Latest addition to my Afghan set up are some Irrigation ditches, good for that "Green Zone" look and good movement hazards for my Force on Force games. The ditches are based around 12" and 6" sections for ease of use and like all my terrain are designed to be placed on the table for maximum flexibility. I wanted a crossroads style junction, a selection of 6" and 12" lengths as well as some end sections. This post will display the finished items and there's also a tutorial on how they were made. Dougie
Dawn in the green zone, the ditches on the table
I always like to add small details to my terrain some shots below.

Irrigation Ditch Tutorial

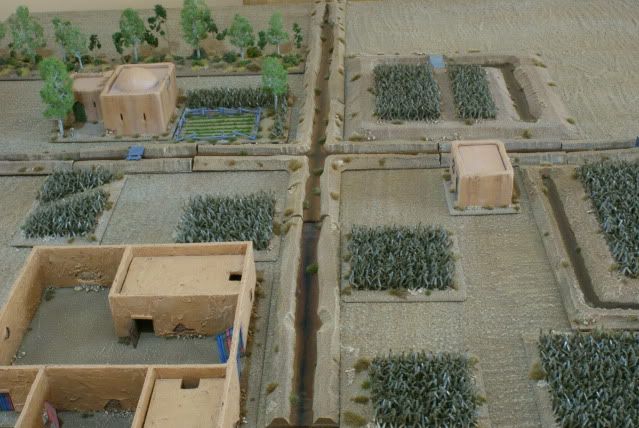
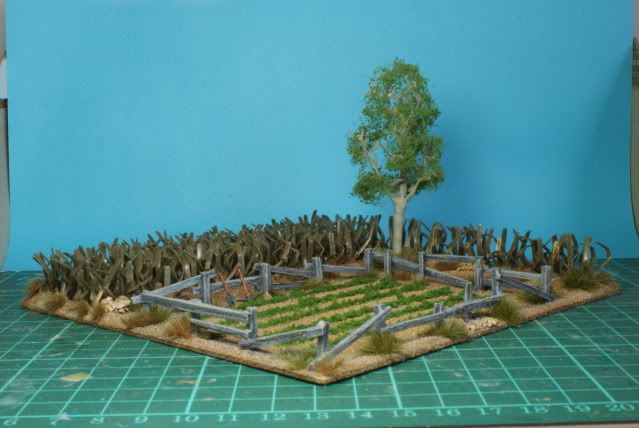
This post is a tutorial on how I made the Irrigation Ditches for my Afghan setup. Like all my terrain its designed to be placed ontop of my terrain tiles and I wanted a variety of sections for maximum flexibility. Below are some step by step photos and I've tried to describe it as fully as possible. Dougie
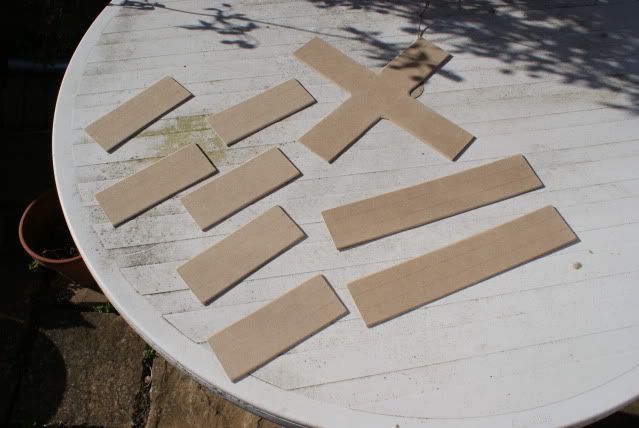
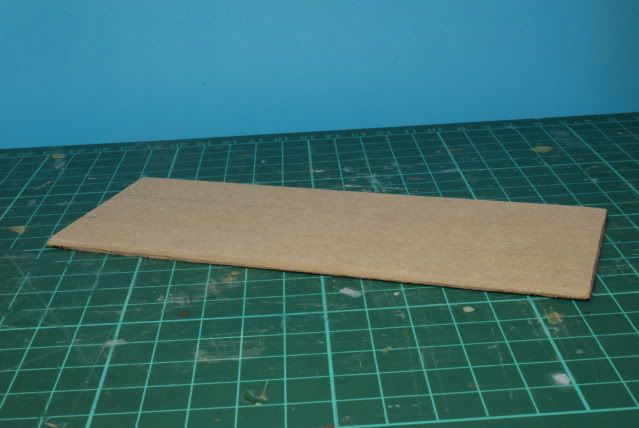
A selection of bases for the ditches, cut from 2mm MDF.
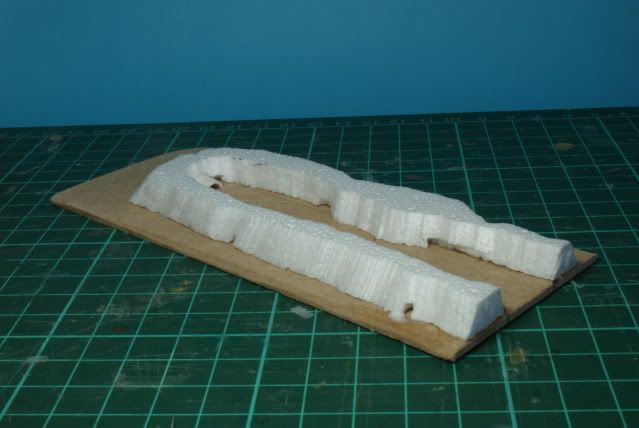
For ease I'll concentrate on 1 section but its the same procedure for all. First off you need to chamfer the base edges with sandpaper to get a nice gradual, smooth, finished look. Don't do the join edges as these need to be square to but up against the other sections.

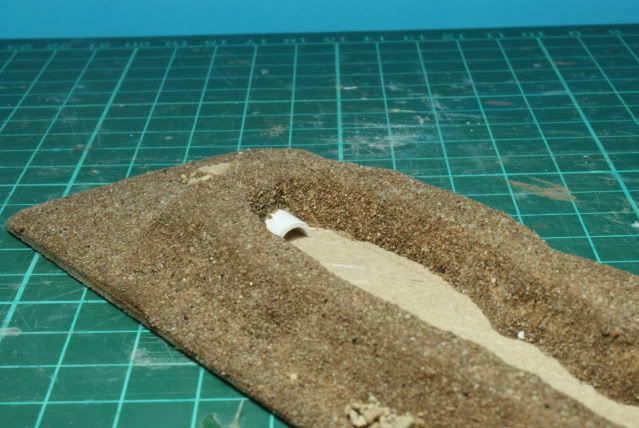
The core of the terrain is made from polystyrene ceiling tile, cut with a hot wire, get the basic look you want then glue it to the base.

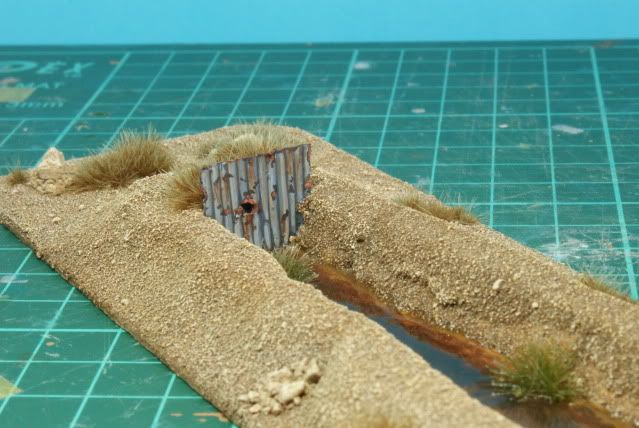
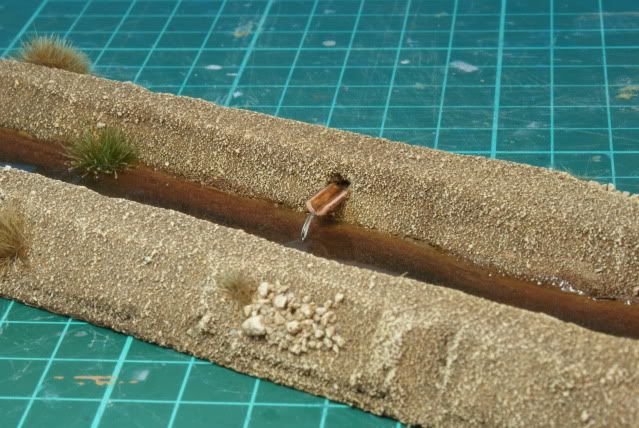
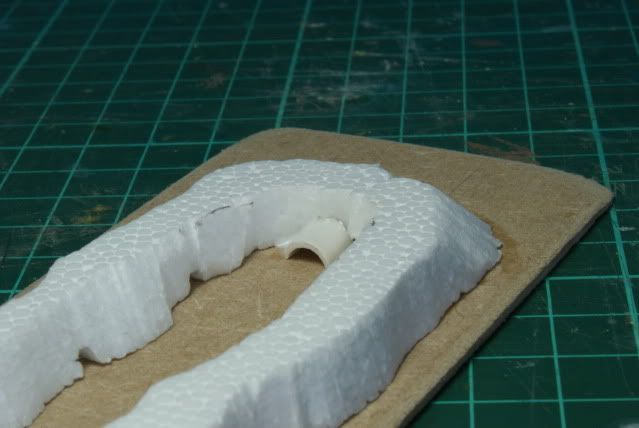
If you want to add some little details now's the time to do it, I've added a small culvert pipe.

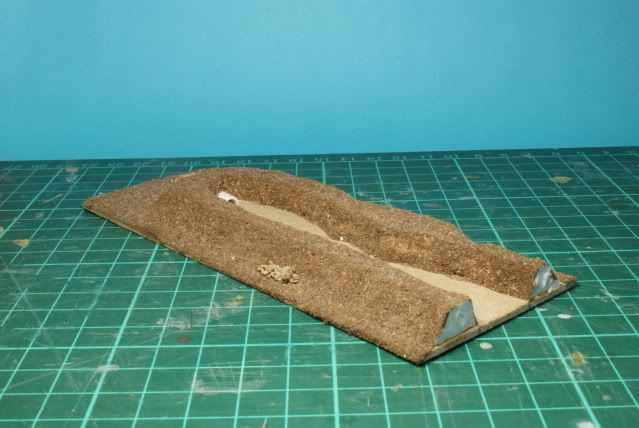
The next step is to sort any holes out with a filler, the smooth surface of the MDF will be the water so keep this as clean as possible. When you're happy with this paint the base with a suitable emulsion paint, I've got my favourites but your normal colour with do,when this is still wet sprinkle the surface with fine play sand and leave to dry. You can also add a few rocks if you like, fix them with white glue.
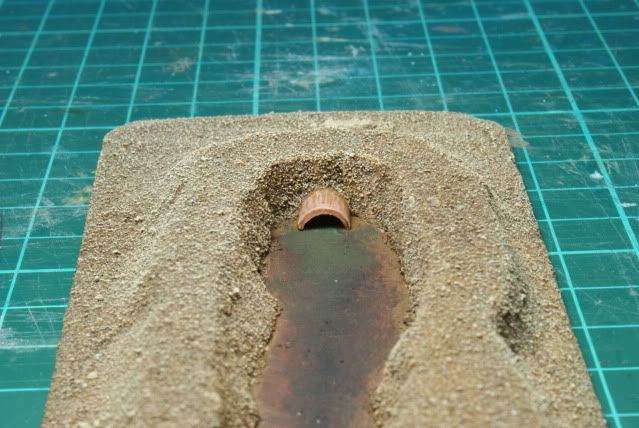
When this is fully dry you need to drybrush the terrain up with lighter shades of your base colour, paint in the water sections, DON'T USE BLUE!!!, and paint your details, in this case the culvert pipe. For the water I've used a dirty brown colour at the edges blended darker towards the centre of the water channel. I also tinted the area of the culvert with green to get an algae look. Be quick about this and blend so you don't get stark contrasts.

Last stage is to add some grass tufts and give the water surface at least 3 good coats of high gloss polyurythane varnish. The finished section.


Sunday 22 April 2012

MJ Figures 20mm Falklands

Saw these guys for the first time at Salute yesterday, the figures are very, very nice! 2 packs currently available BF01 and 02, standard Brit squaddies 4 with SLRs and one with an LMG. Very crisply done, weapons good all with attached bayonet, which is a nice touch, ideal for those Tumbledown scenarios! However if you don't want the bayonet on its a simple case of removing it with a craft knife, all the guys are wearing berets without badges so are useable as infantry of your choice. I met Mr MJ Figures for the first time and he's keen to see the range grow, other Brits in the pipeline as well as Argies. Check out there stuff http://www.mjfigures.co.uk/ the photos below are 2 guys from BF01.  Dougie

Monday 9 April 2012

Afghan Prisoner Escort


An addition to my Helmand stuff, a detainee and escort waiting for the bird to take them to Camp Bastion for a little chat. The escort is Britannia and the detainee is an old Platoon 20 Buddist Monk conversion. An in theatre shot below! Dougie


Sunday 1 April 2012

Afghan Fields done!


The 7 "line of sight blocking" fields finished, added a few tufts and some trees as well as other bits and bobs. A closer view below, the door mat hasn't been touched, just left as it is , quite a time saver. Dougie