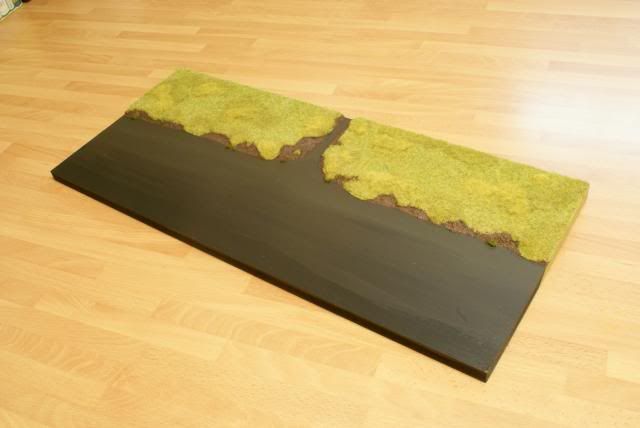
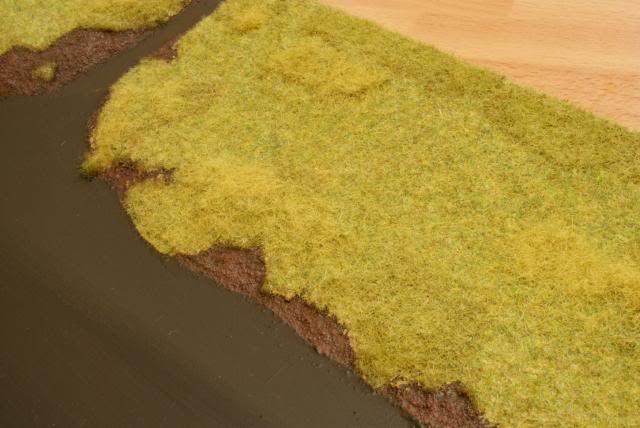
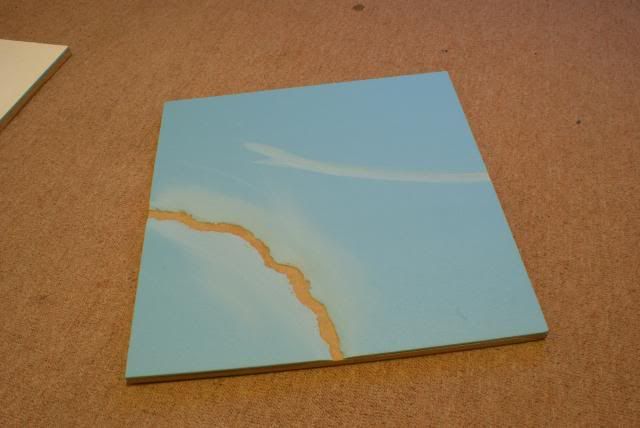
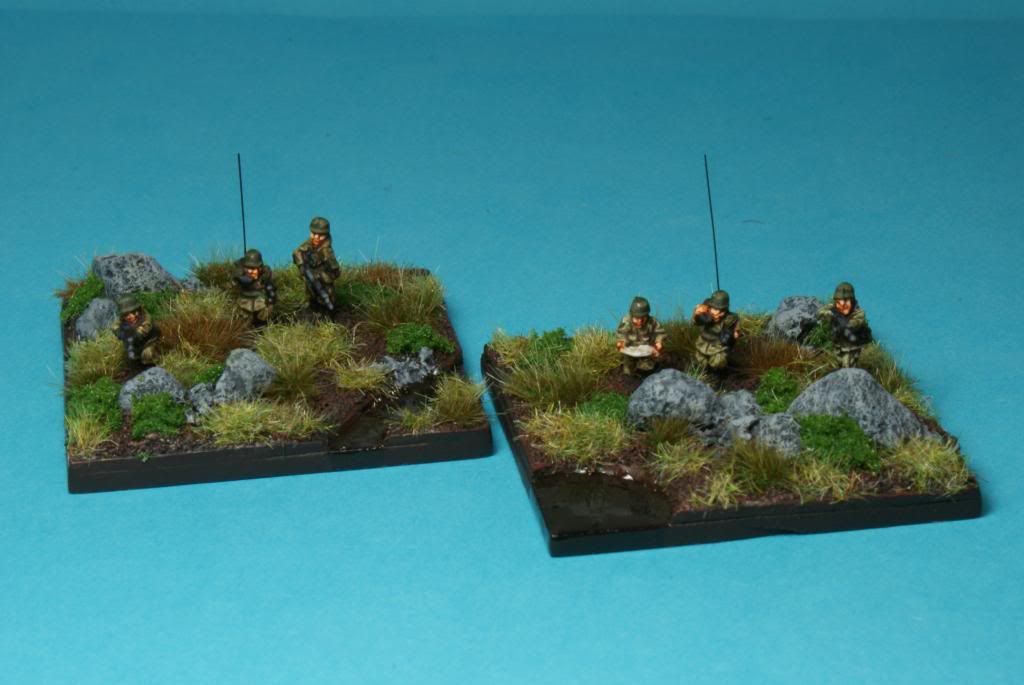
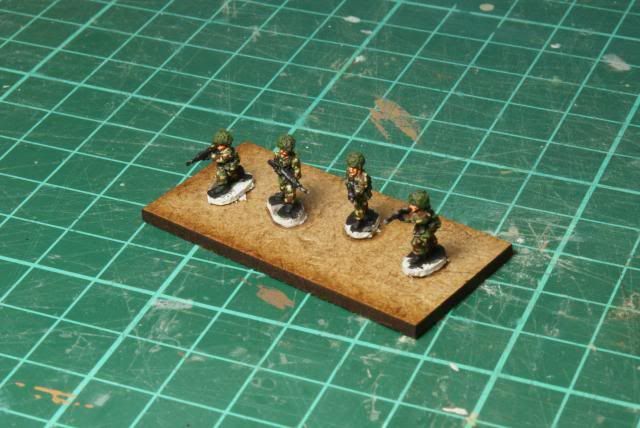
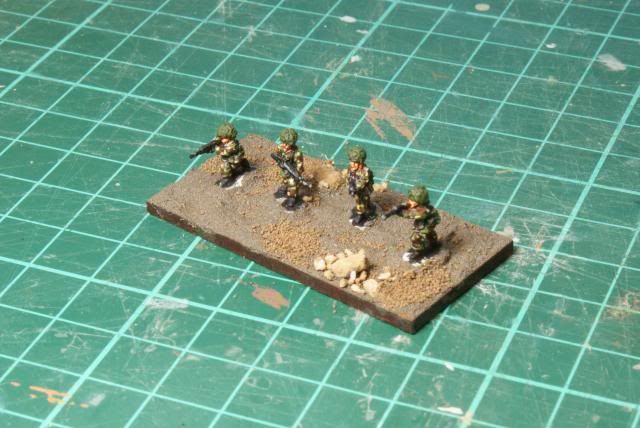
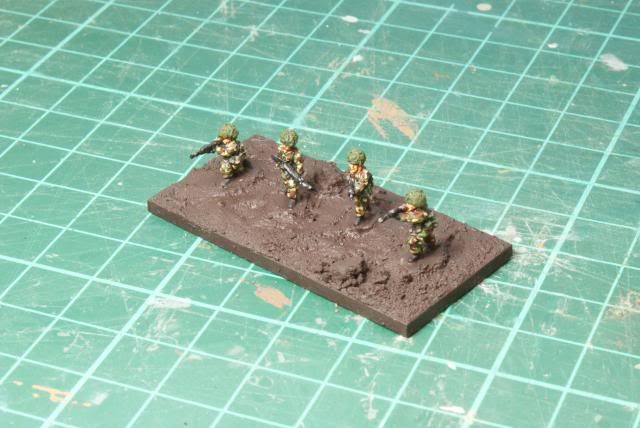
Work restarted on the 3 coast tiles, tissue paper and white glue sea completed.
Showing posts with label Terrain Tutorial. Show all posts
Thursday, 10 February 2022
Monday, 8 November 2021
20mm Falklands Terrain Part 4
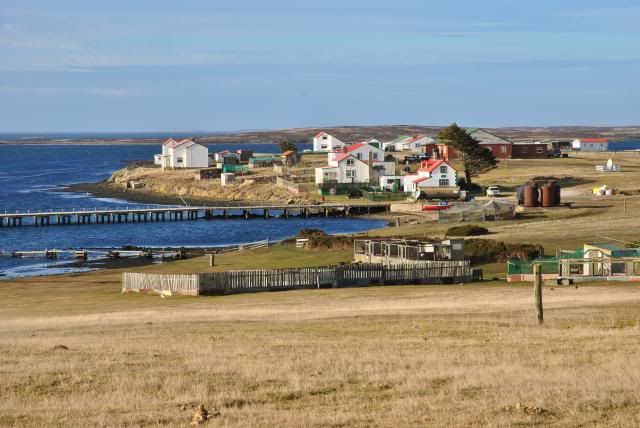
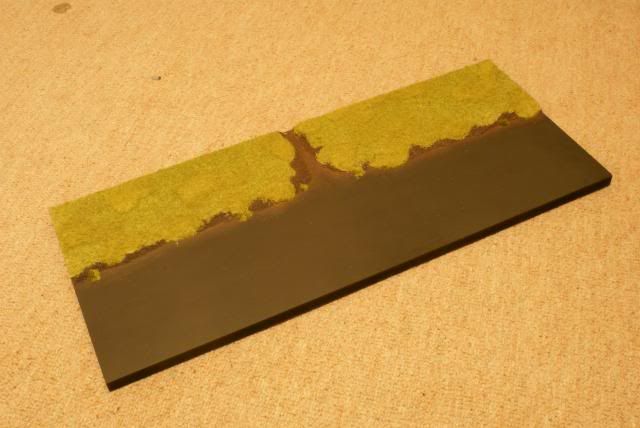
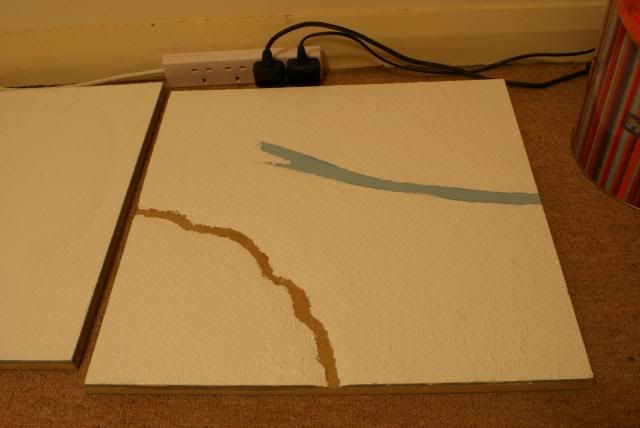
Work commenced on the 3 coastline boards, I wanted a section of beach and sea, here's a view from the Islands
Fairly standard so I've got the initial beach colour on, for the sea I'll be using the toilet paper and white glue method 😉
The top part will be terraced to match in with the boards, they were initially designed for a Goose Green scenario with the coastline being Camilla Creek/Brenton Loch but they'll be adaptable.
Dougie
Monday, 16 March 2015
"Arc of Fire" and markers
"Arc of Fire" rules are one of those systems I tend to return to and I've used them regularly since they were published. I'm not a big fan of markers on the tabletop and in AoF there are some required but in the past I've tended to just write the various status and conditions on the orbats I produce for the games. This keeps the tabletop clear but you tend to continually be turning figures over to get their ID to check on status, this can get a bit irritating and slows the game down.
As a result I've decided to try using markers and see how it goes. In AoF you're not looking at masses, I'm looking at 3 markers for Tactical Modes for each unit, they display 1 of these 3 states at any one time, and for each figure you need to mark if its wounded or not and lastly wether the figures broken or not.
I use AoF mainly for my 20mm collections which are based individually on metal discs, I've discussed these before, the links here, 20mm Basing discs so I wanted to utilise these for the wounded and broken markers but for the Tactical Modes I opted for Warbases Acrylic marker service, here's the link Warbases
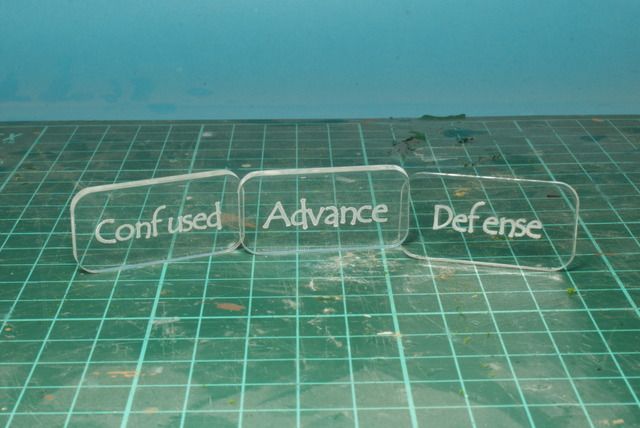
To start off with here's what warbases produced for me, quite pleased, as you only 1 of these per unit they're not too obvious on the tabletop.
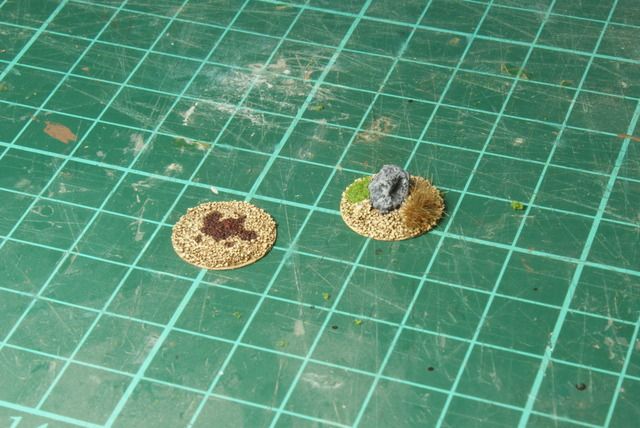
I wanted something to blend in on the tabletop for the wounded and broken markers, wounded was fairly straight forward, blood marks but for the broken status I hummed and harred! I considered discarded equipment and other ideas but as initially I was going to knock out 20 of each so this may have become a bit long winded. I eventually decided just to use rock formations, this would be more generic and not theatre or nationality specific.
The photos below show the construction. Dougie.
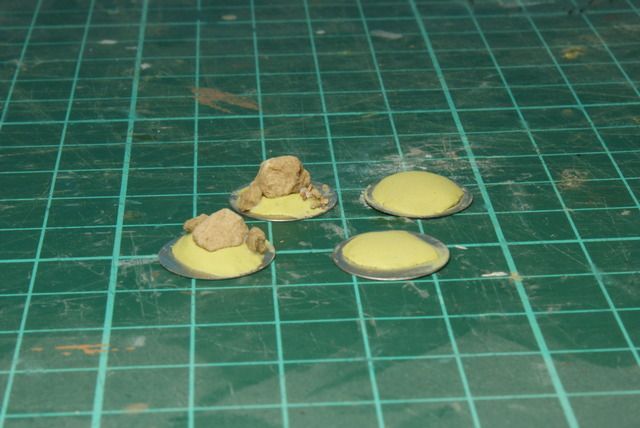
The discs with miliput and talus added.
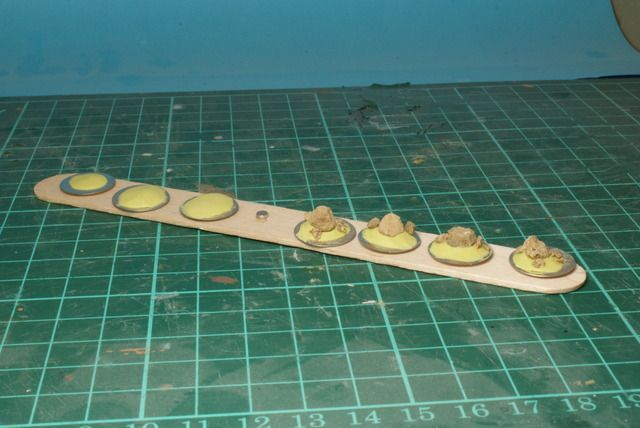
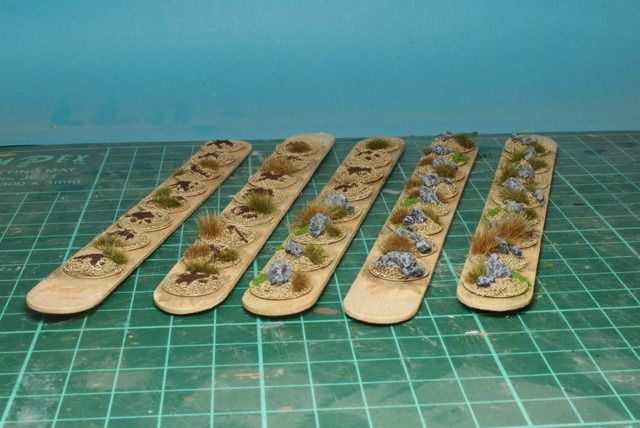
Attached to a painting stick to ease the process and completed with some tufts added
1 of each marker,m wounded on the left broken on the right.
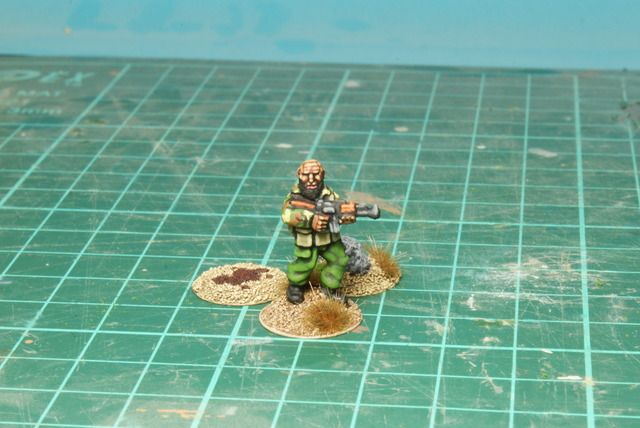
How they'll look, this insurgent is wounded and broken.
As a result I've decided to try using markers and see how it goes. In AoF you're not looking at masses, I'm looking at 3 markers for Tactical Modes for each unit, they display 1 of these 3 states at any one time, and for each figure you need to mark if its wounded or not and lastly wether the figures broken or not.
I use AoF mainly for my 20mm collections which are based individually on metal discs, I've discussed these before, the links here, 20mm Basing discs so I wanted to utilise these for the wounded and broken markers but for the Tactical Modes I opted for Warbases Acrylic marker service, here's the link Warbases
To start off with here's what warbases produced for me, quite pleased, as you only 1 of these per unit they're not too obvious on the tabletop.
I wanted something to blend in on the tabletop for the wounded and broken markers, wounded was fairly straight forward, blood marks but for the broken status I hummed and harred! I considered discarded equipment and other ideas but as initially I was going to knock out 20 of each so this may have become a bit long winded. I eventually decided just to use rock formations, this would be more generic and not theatre or nationality specific.
The photos below show the construction. Dougie.
The discs with miliput and talus added.
Attached to a painting stick to ease the process and completed with some tufts added
1 of each marker,m wounded on the left broken on the right.
How they'll look, this insurgent is wounded and broken.
Monday, 30 June 2014
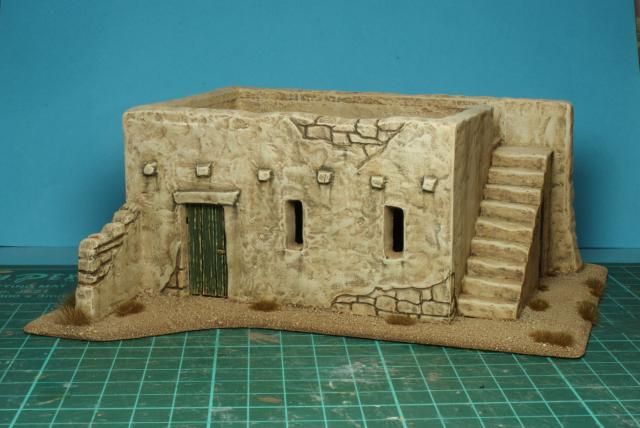
Renedra 1/56th scale 28mm Mud Brick House continued
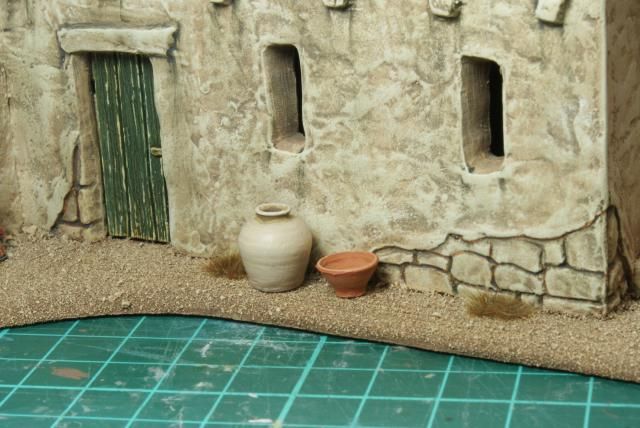
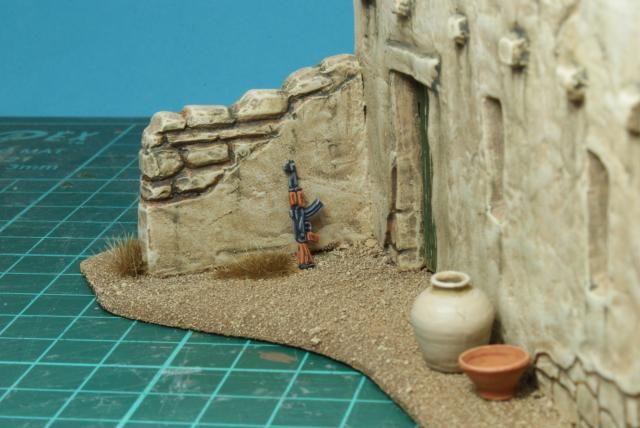
I've ordered some 28mm scenic items from Black Cat Bases, farm implements, tools etc, to liven the house up a bit, they havent arrived yet so in the meantime I've added a couple of pots and an AK.
Dougie
A couple of close ups
Dougie
A couple of close ups
Friday, 30 May 2014
Renedra 1/56th scale 28mm Mud Brick House Part 3
Progress with this building, the door's been painted, distressed and attached, the structure given a drab monotone colour and attached to the base which I've finished. All that's left to do is add some small scenic details and pull it all together with a dusting.
Dougie
Dougie
Sunday, 18 May 2014
Renedra 1/56th scale 28mm Mud Brick House Part 2
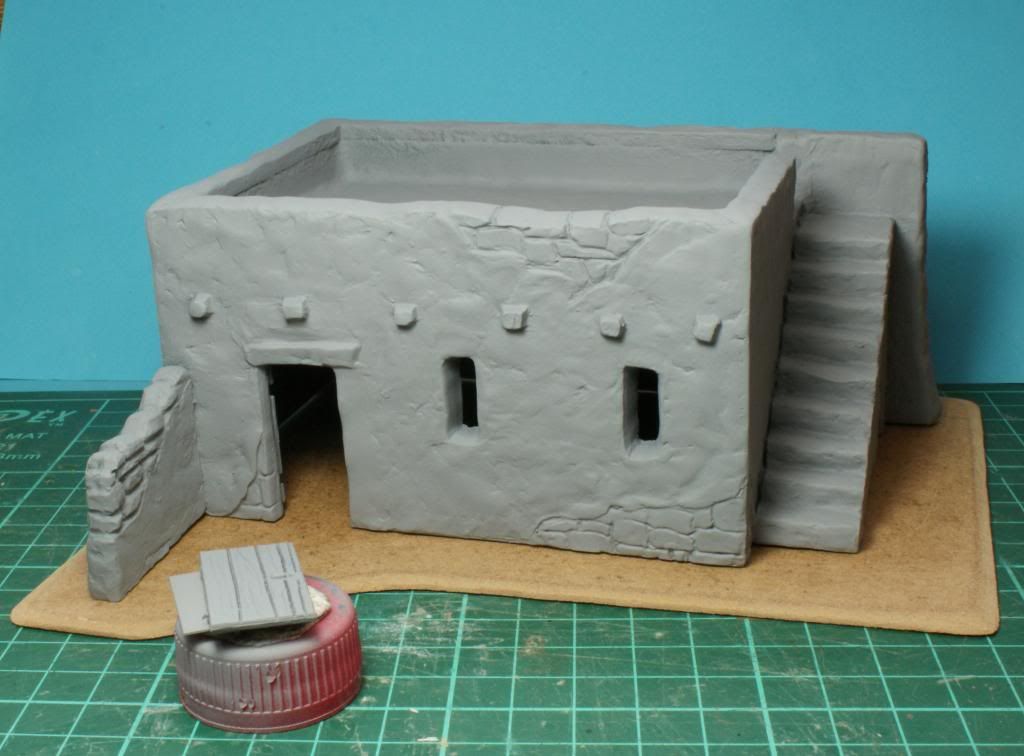
The base has been cut from 2mm mdf and the edge chamfered, the structure's had a blast of Halfords grey primer. I think I'll be painting it seperately from the base then attaching it and dusting the whole lot down to key it together.
Dougie
Dougie
Thursday, 15 May 2014
Monday, 12 May 2014
20mm Top Malo House Part 5
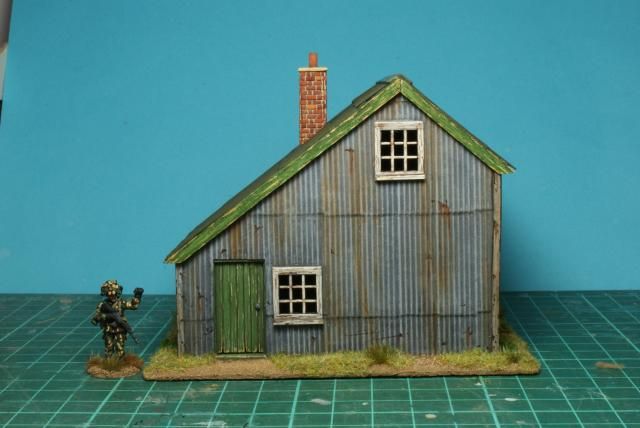
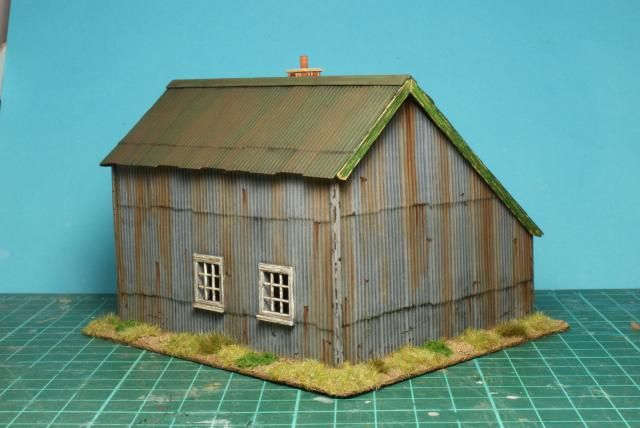
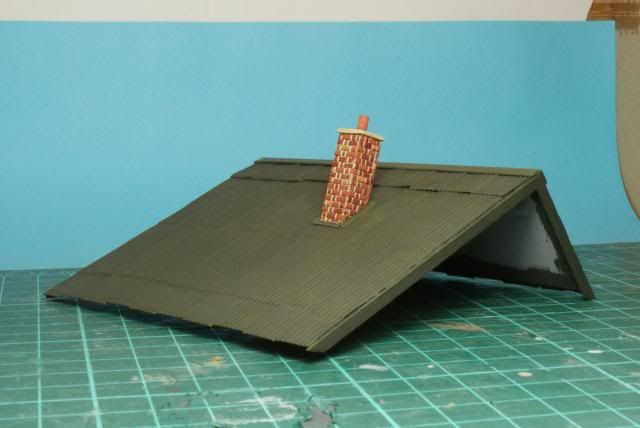
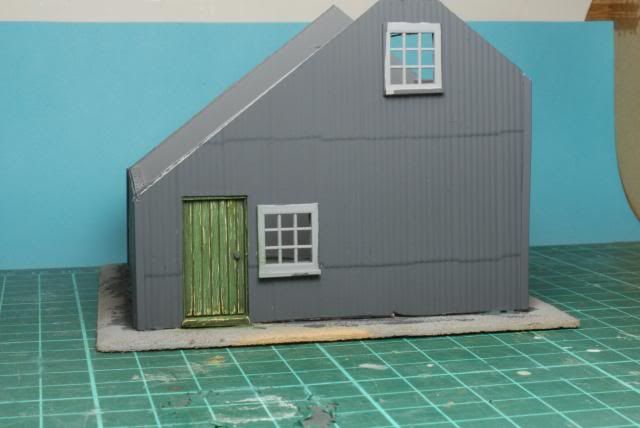
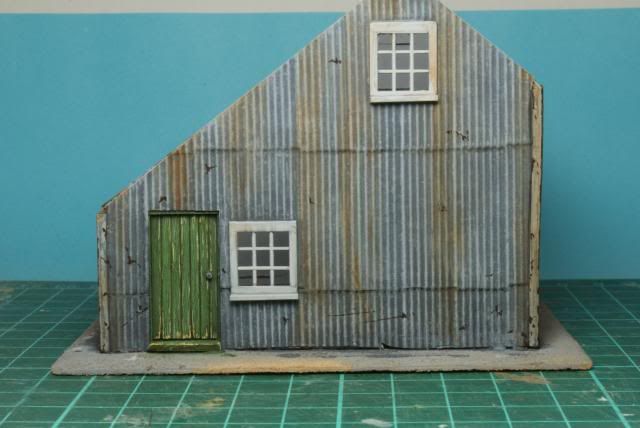
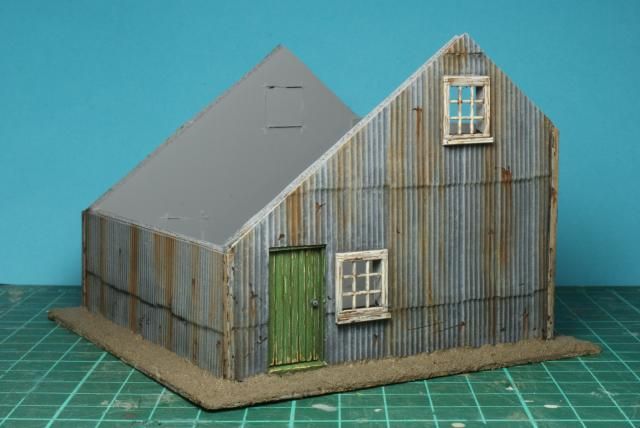
The progress with Top Malo, I wanted a distressed worn look, first off, after priming, was to block the colours in and start some detail work. I painted the roof a dark green and the walls grey, then started on the chimney. I'd used wills finecast brick sheeting, the brick is nicely detailed and took paint well, this was fully completed before I did anything else.
The door I wanted worn with the paint peeling, I selected a green then peeled and chipped it. The balsa door simply needed drybrushing up with lighter shades, the distressed peeling areas painted in and a darker wash to cool it all down.
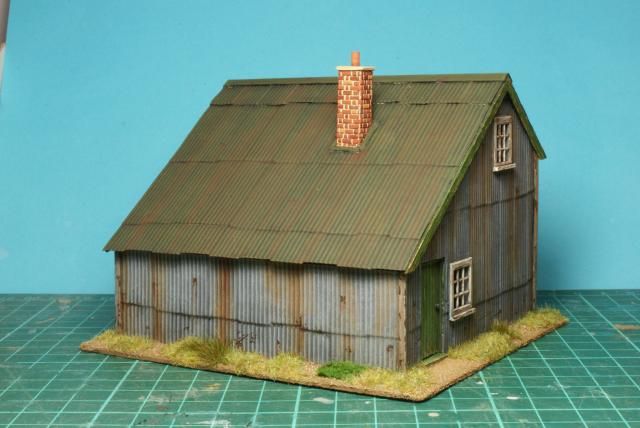
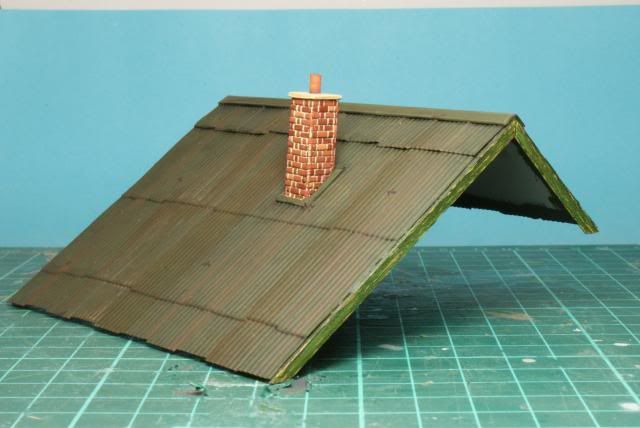
Back to the roof, I painted in the roof barge boards and used the same method as the door then drybrushed up the roof with lighter shades of green to bring out the wriggly tin. It then received a dark wash along the wriggly tin overlaps and chipping added. I then added the various levels of rusting using MIG and AK Interactive products which are really easy to use, and the roof was complete.
I followed the same tecniques for the walls as I used on the roof, with more chipping at the lower level where items are more likely to scratch and cause damage. The photo below shows a wall having received the initial rusting but before the specific chip rusting has been applied.
I then added the specific rusting and painted and distressed the windows and got the initial groundwork on the base and that's where we are at the moment. I'm pleased with the way its progressing.
Dougie
The door I wanted worn with the paint peeling, I selected a green then peeled and chipped it. The balsa door simply needed drybrushing up with lighter shades, the distressed peeling areas painted in and a darker wash to cool it all down.
Back to the roof, I painted in the roof barge boards and used the same method as the door then drybrushed up the roof with lighter shades of green to bring out the wriggly tin. It then received a dark wash along the wriggly tin overlaps and chipping added. I then added the various levels of rusting using MIG and AK Interactive products which are really easy to use, and the roof was complete.
I followed the same tecniques for the walls as I used on the roof, with more chipping at the lower level where items are more likely to scratch and cause damage. The photo below shows a wall having received the initial rusting but before the specific chip rusting has been applied.
I then added the specific rusting and painted and distressed the windows and got the initial groundwork on the base and that's where we are at the moment. I'm pleased with the way its progressing.
Dougie
Wednesday, 18 December 2013
Burntside Hill terrain part 6
Water areas completed using a good gloss varnish, I use Ronseal Ultra Tough Hardglaze Gloss. This is a polyurethane varnish which is what you want, the water based gloss varnishes just don't dry shiny enough!
Here's a shot of the section I've been using to show the tecniques.
One of the tiles and a close up
To get some idea of scale first with 10mm Pendraken stuff, hopefully I've achieved the barren Falklands look?
Here's a shot with 20mm figures, a UKSF patrol calls a halt!
Keep watching! Dougie
Here's a shot of the section I've been using to show the tecniques.
One of the tiles and a close up
To get some idea of scale first with 10mm Pendraken stuff, hopefully I've achieved the barren Falklands look?
Here's a shot with 20mm figures, a UKSF patrol calls a halt!
Keep watching! Dougie
Sunday, 1 December 2013
Burntside Hill terrain part 5
I've been out the loop for a couple of weeks but I'm sorted now, next stage on the piece is to give depth to the grass, additional clumps added as well as tufts, the whole piece was then spray soaked with Woodland Scenics Scenic cement (Thinned white glue). When its dry the surface is virtually indestructible and you loose No flock!!! I've also painted in the stream/river a dirty peaty brown/black, no blue rivers here, a bit of a bugbear of mine, if you look carefully you can see the grading. Dougie
A close up to show the subtle depth to the grass cover
Tuesday, 19 November 2013
Burntside Hill terrain part 4
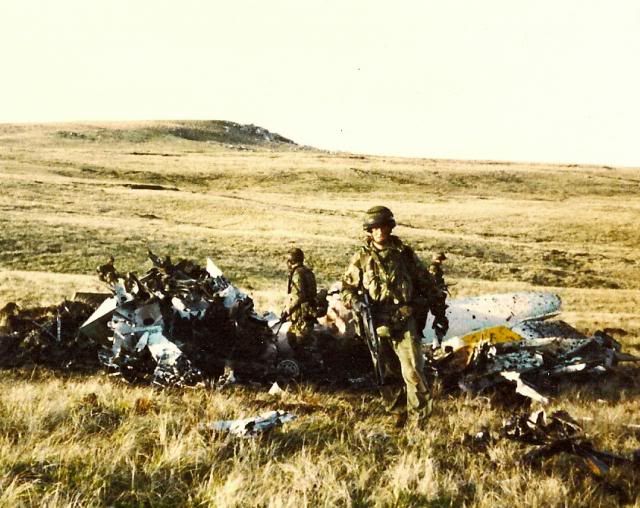
I want the terrain to be heavily grassed with few areas of the earth showing, the area of Goose Green is really undulating grassland of quite a monotonous colour but rough in places, the 2 photos below give an idea of the look I'm after.
I'll be showing this section of Camilla Creek to illustrate the tecniques I've used, the ground's been given the very dark damp earth colour, then very gently drybrushed up I wanted to keep the base colour quite dark so the lighter shades have to be quite gentle. The shot shows the grass cover on, I'll do some close ups I've tried to achieve the heavily covered look this park of the Falklands doesn't have the rockruns etc. I'll do some closer shots tomorrow, the shades on the photo are a little off, it looks nicer in the flesh and I'm quite pleased
Dougie
I'll be showing this section of Camilla Creek to illustrate the tecniques I've used, the ground's been given the very dark damp earth colour, then very gently drybrushed up I wanted to keep the base colour quite dark so the lighter shades have to be quite gentle. The shot shows the grass cover on, I'll do some close ups I've tried to achieve the heavily covered look this park of the Falklands doesn't have the rockruns etc. I'll do some closer shots tomorrow, the shades on the photo are a little off, it looks nicer in the flesh and I'm quite pleased
Dougie
Monday, 18 November 2013
Burntside Hill terrain part 3
Got all the contours sanded, the "Hills" in question were very low level not much more than raised ground really so I wanted quite a gentle unassuming look to them. The craftfoam is easy to sand with normal sandpaper. For the tracks I've just sanded a shallow cutting into the foam, we're not talking roads here!
The photo below shows one of the boards after sanding, you can see where the hot wired stream edges have been sanded and the track cut into the surface.
The next stage is to paint the ground areas with Polycell rough ceiling paint, this gives the terrain some texture and blends edges.
Next we'll be getting some colour on the boards! Dougie
The photo below shows one of the boards after sanding, you can see where the hot wired stream edges have been sanded and the track cut into the surface.
The next stage is to paint the ground areas with Polycell rough ceiling paint, this gives the terrain some texture and blends edges.
Next we'll be getting some colour on the boards! Dougie
Burntside Hill terrain part 2
The tile basics now done, the blue craftfoam's been cut with a hotwire and attached to the MDF tiles, the photo below shows the terrain layout, its quite compact 150cm x 120cm. The second photo shows a closeup, all the craft foam is attached with Evo-Stik PVA, next job is to sand the contours smooth. Dougie
Tuesday, 12 November 2013
Burntside Hill terrain Part 1
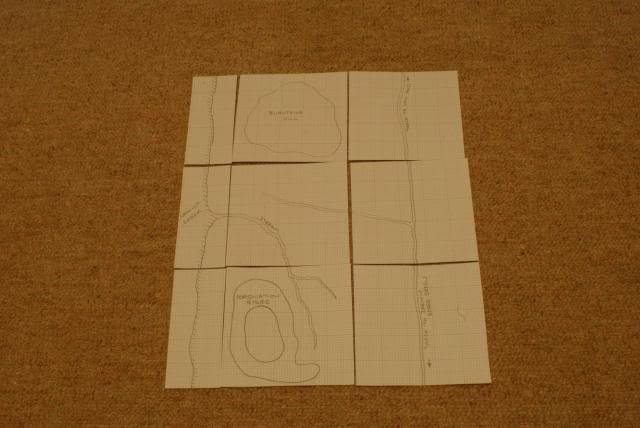
Here's the plan for the board, the large squares are 500mm x 500mm and the 3 water strips on the left hand side are 500mm x 210mm. Basically the terrain from top to bottom is as follows, on the west the Isthmus ends with Camilla Creek, at the top left is Burntside Hill itself, heading south we cross a stream running into Camilla Creek we then hit more high ground at Coronation Ridge. On the east side of the board we have relatively flat terrain with the track linking Low Pass in the north to the settlements of Darwin and Goose Green in the south. Dougie
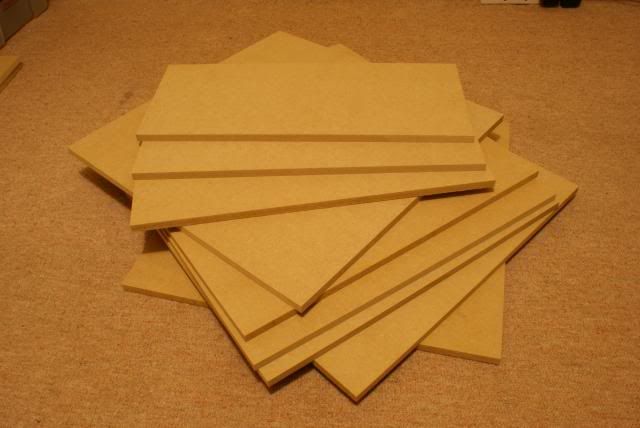
The MDF is all cut, B&Q did a really good job, quite impressed!
Monday, 11 November 2013
Smoggycon Game - Burntside Hill Goose Green Falklands 1982 in 10mm
I'm putting on a demo game at Smoggycon this year. It is a refight of B Company 2PARA assaulting Burntside Hill at the start of the battle of Goose Green. This action occurred just after B Coy crossed their startline in darkness on the western side of the Goose Green Isthmus.
Goose green is covered in a number of books. "Goose Green - A battle is fought to be won" by Mark Adkin was published in 1992 and for many this is the book to read. However any student of the Falklands Campaign must read "Not mentioned in despatches - The history and Mythology of the Battle of Goose Green" by Spencer Fitz-Gibbon. This is hard reading, it shatters many illusions but for the good, read this book if you can get a copy!
All the figures are done now and illustrated in previous posts, for the demo we'll be using CWC, each infantry stand representing a section. The terrain is purpose built by myself, it has been simplified a little but the main features are present. I wanted it geomorphic so my 20mm guys could use it as well!
The terrain is composed of terrain tiles 500mm x 500mm, there's 6 forming the battlefield and 3 smaller sections representing Camilla Creek.
All the tiles are made from a base of 12mm MDF. I got a large sheet from B&Q for £19, they cut it very accurately for free and I ended up with 8 full 500mm x 500mm tiles as well as the extra Camilla Creek ones. The terrain itself is formed from 5mm thick blue foamboard available here:
http://shop.panelsystems.co.uk/craftfoam/modelling-foam/craft-foam-blue.html
This is glued to the MDF and the terrain sculpted into it. The MDF acts as the waterlevel with the terrain ontop.
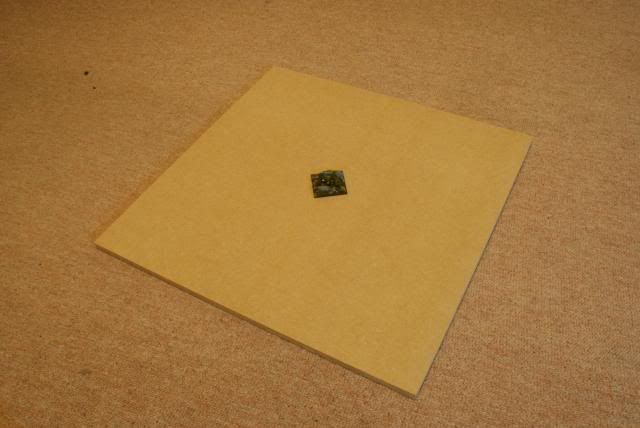
Here's a shot of one of the tiles. Updates to follow as we go through the construction. That's a Command base on the tile for scale. Dougie
Goose green is covered in a number of books. "Goose Green - A battle is fought to be won" by Mark Adkin was published in 1992 and for many this is the book to read. However any student of the Falklands Campaign must read "Not mentioned in despatches - The history and Mythology of the Battle of Goose Green" by Spencer Fitz-Gibbon. This is hard reading, it shatters many illusions but for the good, read this book if you can get a copy!
All the figures are done now and illustrated in previous posts, for the demo we'll be using CWC, each infantry stand representing a section. The terrain is purpose built by myself, it has been simplified a little but the main features are present. I wanted it geomorphic so my 20mm guys could use it as well!
The terrain is composed of terrain tiles 500mm x 500mm, there's 6 forming the battlefield and 3 smaller sections representing Camilla Creek.
All the tiles are made from a base of 12mm MDF. I got a large sheet from B&Q for £19, they cut it very accurately for free and I ended up with 8 full 500mm x 500mm tiles as well as the extra Camilla Creek ones. The terrain itself is formed from 5mm thick blue foamboard available here:
http://shop.panelsystems.co.uk/craftfoam/modelling-foam/craft-foam-blue.html
This is glued to the MDF and the terrain sculpted into it. The MDF acts as the waterlevel with the terrain ontop.
Here's a shot of one of the tiles. Updates to follow as we go through the construction. That's a Command base on the tile for scale. Dougie
Monday, 14 October 2013
10mm Falklands Basing Tutorial
Hi Folks, I've had a number of requests for a Tutorial on how I've been basing my 10mm Falklands collection so here it is.
First off the look I was wanting to achieve was wet peat, lots of water features, rock runs, babies heads (Tussock grass) and gorse. I've used Warbases premier mdf bases and gone from there, for water features I've used the mdf base as water level then built up the land with plasticard. A photo of what I mean below.
Right on with the tutorial! Dougie
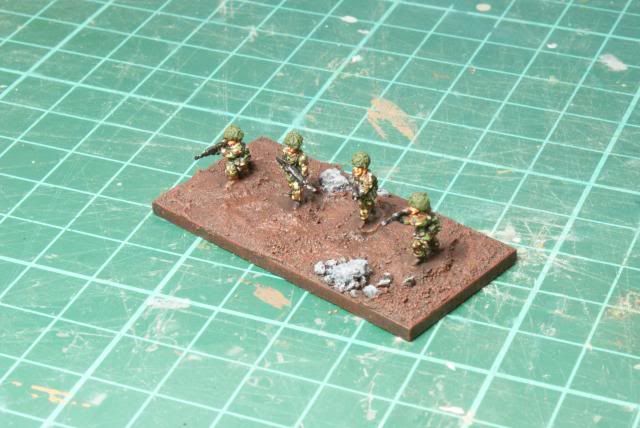
1. The completed figures are attached to the mdf base, this example is a Brit unit and the base will be without water features so no building up with a plasticard base.
2. A layer of Vallejo Dark Earth basing paste 26.218 is then applied to blend in the figure bases and form the ground. Whilst this is still wet Assorted Woodland Scenics Talus and ballast is pressed into the basing paste. This is then left to dry.
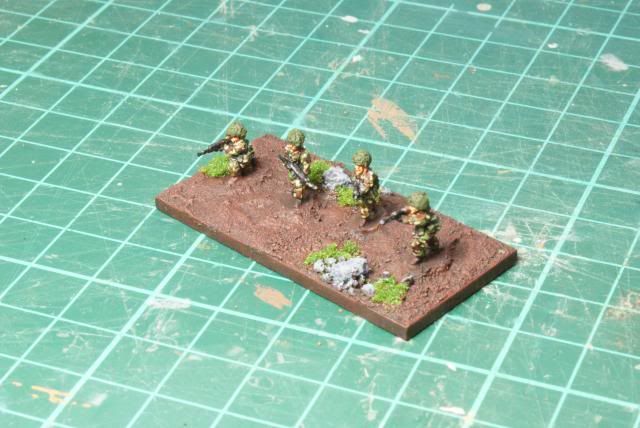
3. The whole base is then given a coat of VMC SS Black Brown 822.
4. The whole base is then dry brushed with VMC Flat Brown 984, followed by dry brushing lightly with VMC Mahogony Brown 846. The rocks are then painted VMC Dark Grey 994, and dry brushed with VMC London Grey 836 followed by VMC Light Grey 990.
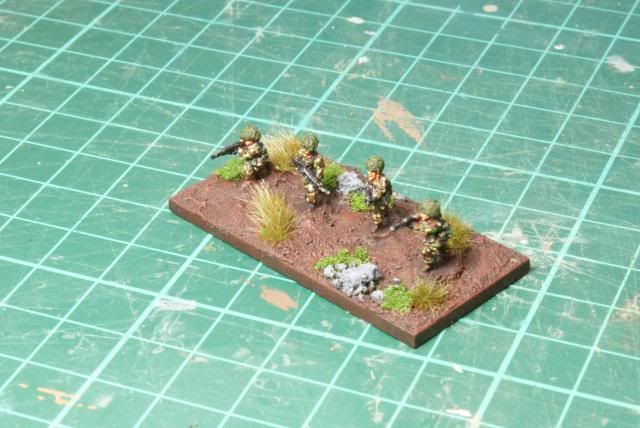
5. Gorse is added, I've used Woodland Scenics Course turf medium green, attach with white glue and give it a wash of thinned white glue to seal it.
6. Babies heads tussock grass added next, I've used Silfor 2 tone Early Fall Tufts in varying sizes.
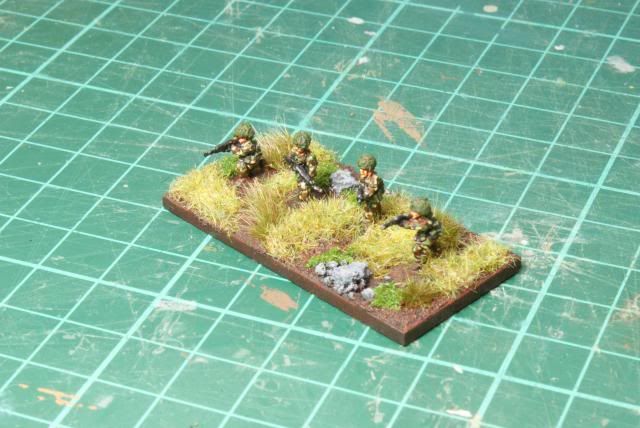
7. The last stage is to add your static grass, this is my own Falklands blend, you need more yellow than green in your mixture. Mines a blend of Woodland Scenics Harvest Gold with Silfor 2mm Early Fall.
That's it your done, most important advice is to look at plenty of photos for reference, I was on the Falklands in 1984 and was expecting it to look green, it doesn't, its much yellower in colour and this is what I've tried to achieve.
Later, Dougie
First off the look I was wanting to achieve was wet peat, lots of water features, rock runs, babies heads (Tussock grass) and gorse. I've used Warbases premier mdf bases and gone from there, for water features I've used the mdf base as water level then built up the land with plasticard. A photo of what I mean below.
Right on with the tutorial! Dougie
1. The completed figures are attached to the mdf base, this example is a Brit unit and the base will be without water features so no building up with a plasticard base.
2. A layer of Vallejo Dark Earth basing paste 26.218 is then applied to blend in the figure bases and form the ground. Whilst this is still wet Assorted Woodland Scenics Talus and ballast is pressed into the basing paste. This is then left to dry.
3. The whole base is then given a coat of VMC SS Black Brown 822.
4. The whole base is then dry brushed with VMC Flat Brown 984, followed by dry brushing lightly with VMC Mahogony Brown 846. The rocks are then painted VMC Dark Grey 994, and dry brushed with VMC London Grey 836 followed by VMC Light Grey 990.
5. Gorse is added, I've used Woodland Scenics Course turf medium green, attach with white glue and give it a wash of thinned white glue to seal it.
6. Babies heads tussock grass added next, I've used Silfor 2 tone Early Fall Tufts in varying sizes.
7. The last stage is to add your static grass, this is my own Falklands blend, you need more yellow than green in your mixture. Mines a blend of Woodland Scenics Harvest Gold with Silfor 2mm Early Fall.
That's it your done, most important advice is to look at plenty of photos for reference, I was on the Falklands in 1984 and was expecting it to look green, it doesn't, its much yellower in colour and this is what I've tried to achieve.
Later, Dougie
Subscribe to:
Posts (Atom)